How to Batch Social Media Content (and Get Your Week Back)
One post at a time vs. batching
Most people start by making posts one by one: think of an idea, write it, find an image, post it, repeat tomorrow. Every post forces you to switch between thinking, writing, designing and publishing. Those switches are where the time goes.
Batching groups similar work together. Your brain stays in one mode for longer, decisions you make once (tone, format, hashtags, CTA) apply to many posts, and you stop scrambling for something to post on a busy day.
| One post at a time | Batched | |
|---|---|---|
| When ideas happen | Right before posting | In one idea session, from a backlog |
| Writing | Scattered across the week | One or two focused blocks |
| Adapting per channel | Often skipped when rushed | Done for every post in one pass |
| Approval | Ad hoc messages, last minute | One review round for the whole batch |
| Scheduling | Daily, manual | Once for the week or month |
| Consistency | Drops when you get busy | Posts are ready before the busy week |
Batching is not about making more content. It is about making the same amount with fewer interruptions, so the quality per post goes up.
Before you batch: decide what you are batching for
A batch without direction becomes a pile of random posts. Spend fifteen minutes on these three decisions first.
- The goal for this batch. For example: fill bookings for May, launch a new service, or grow LinkedIn followers among local businesses.
- The pillars you will cover. Pick two to four recurring themes. If you don't have any yet, see how to create content pillars.
- The batch size and period. One week (5–10 posts) is a good first batch. Monthly batching works once the routine is stable.
The batching workflow, step by step
- 1
Choose your content goals
Write one sentence describing what this batch should achieve and who it is for. Every post in the batch should support that sentence. - 2
Decide on content pillars
Assign each slot in the batch a pillar, for example two educational posts, two behind-the-scenes, one customer story and one offer. This prevents a batch that is all promotion. - 3
Collect ideas in one session
Pull from your backlog, customer questions, recent work and anything worth repurposing. Aim for more ideas than slots so you can drop the weak ones. Our list of social media content ideas for small businesses can fill gaps. - 4
Batch the creation
Write all the main versions in one block. Then source or create all images in a second block. Mixing writing and design in the same session is the most common reason batching feels slow. - 5
Adapt every post for each platform
Go through the batch once per channel: shorten for X, add a strong first line for LinkedIn, rework the visual for Instagram. The repurposing tutorial covers what to change per platform. - 6
Review and approve as one round
Send the whole batch for review at once with a clear deadline. One review round is faster for the reviewer and for you than ten separate requests. - 7
Schedule the batch
Place posts on your calendar, spread pillars across the week and pick times. See how to schedule social media content for a scheduling routine. - 8
Review results before the next batch
Before the next session, look at which posts did well and which did not. Let that decide the pillar mix and formats of the next batch.
Example: a two-hour weekly batching session
Here is how a solo marketer at a small bakery could batch one week of posts for Instagram, Facebook and LinkedIn.
| Time | Task | Output |
|---|---|---|
| 0:00–0:15 | Set goal and pillar mix | Goal: promote weekend pre-orders. Mix: 2 educational, 2 behind the scenes, 1 customer, 1 offer |
| 0:15–0:35 | Collect ideas | 9 ideas, keep the best 6 |
| 0:35–1:15 | Write main captions | 6 finished base captions |
| 1:15–1:35 | Gather images | Photos from this week's bakes, one short video clip |
| 1:35–1:50 | Adapt per channel | Shorter Facebook versions, a LinkedIn post about the team |
| 1:50–2:00 | Send for review and schedule | Batch scheduled Mon–Sat once approved |
The first sessions will take longer. After three or four weeks the same batch usually takes noticeably less time, because pillars, formats and CTAs are already decided.
Batching tips that actually help
- Keep an ideas backlog between sessions. Capture ideas in one place whenever they come up, so the idea step starts full. Our guide to organizing marketing content shows a simple setup.
- Leave one or two open slots. Timely news and reactions still matter. A batch that fills every slot leaves no room for them.
- Batch similar formats together. Write all carousels together, all short posts together. Format switching is a hidden cost.
- Use the same review deadline every week. Reviewers learn the rhythm, and approvals stop being the bottleneck.
- Batch by month only when weekly works. Monthly batches multiply mistakes if the process is not stable yet. When you are ready, plan a month of content first.
Common batching mistakes
- Batching without a goal. You end up with posts that are fine individually but don't add up to anything.
- Pasting the same caption everywhere. Batching saves time on adaptation, it doesn't remove it.
- Scheduling before approval. If someone else needs to sign off, approve first, then schedule.
- Never looking back. If you don't review results, every batch is a fresh guess.
- Making batches too big too early. A thirty-post first batch usually gets abandoned halfway.
Batching checklist
- Goal for this batch written in one sentence
- Pillar mix assigned to every slot
- More ideas than slots, weak ones dropped
- All captions written in one block
- All visuals gathered in a separate block
- Every post adapted for each channel it will go to
- Whole batch sent for review with a deadline
- Batch scheduled and spread across the week
- Results reviewed before the next session
How Wemify can help
Wemify follows the same order a batch does: plan, create, adapt, approve, schedule and publish. You can group a batch in a campaign, write and refine drafts, adapt each draft per channel, send it for review and then schedule it.
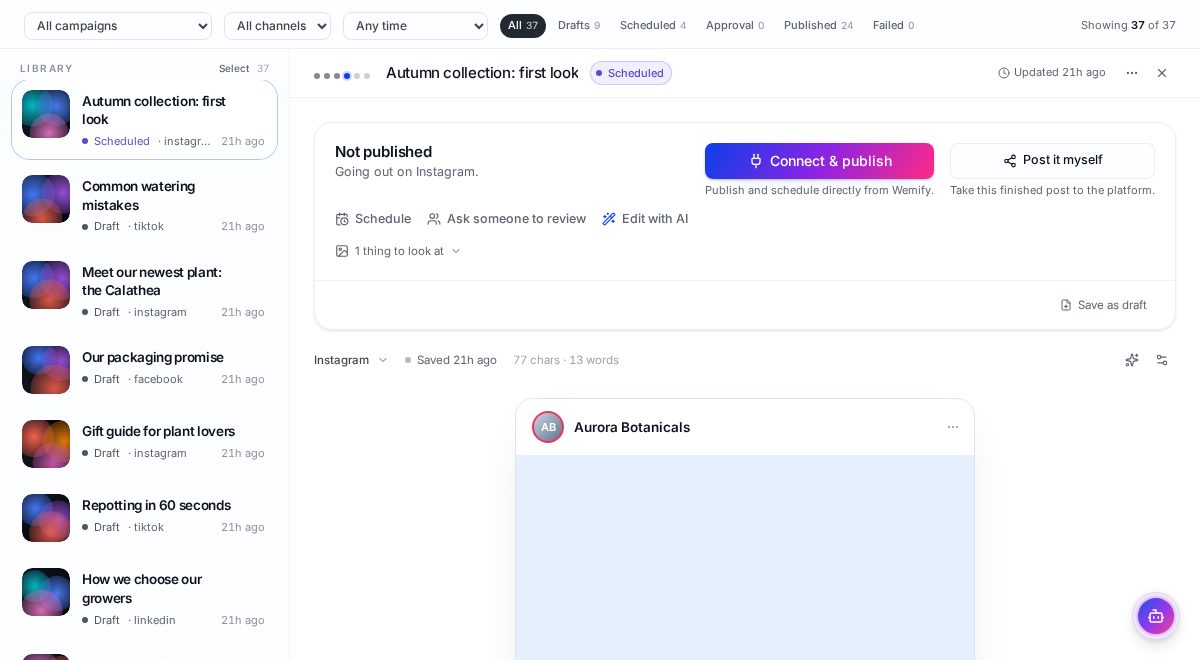
The Posts library makes it easy to see where a batch stands: which posts are still drafts, which are waiting for approval and which are scheduled.
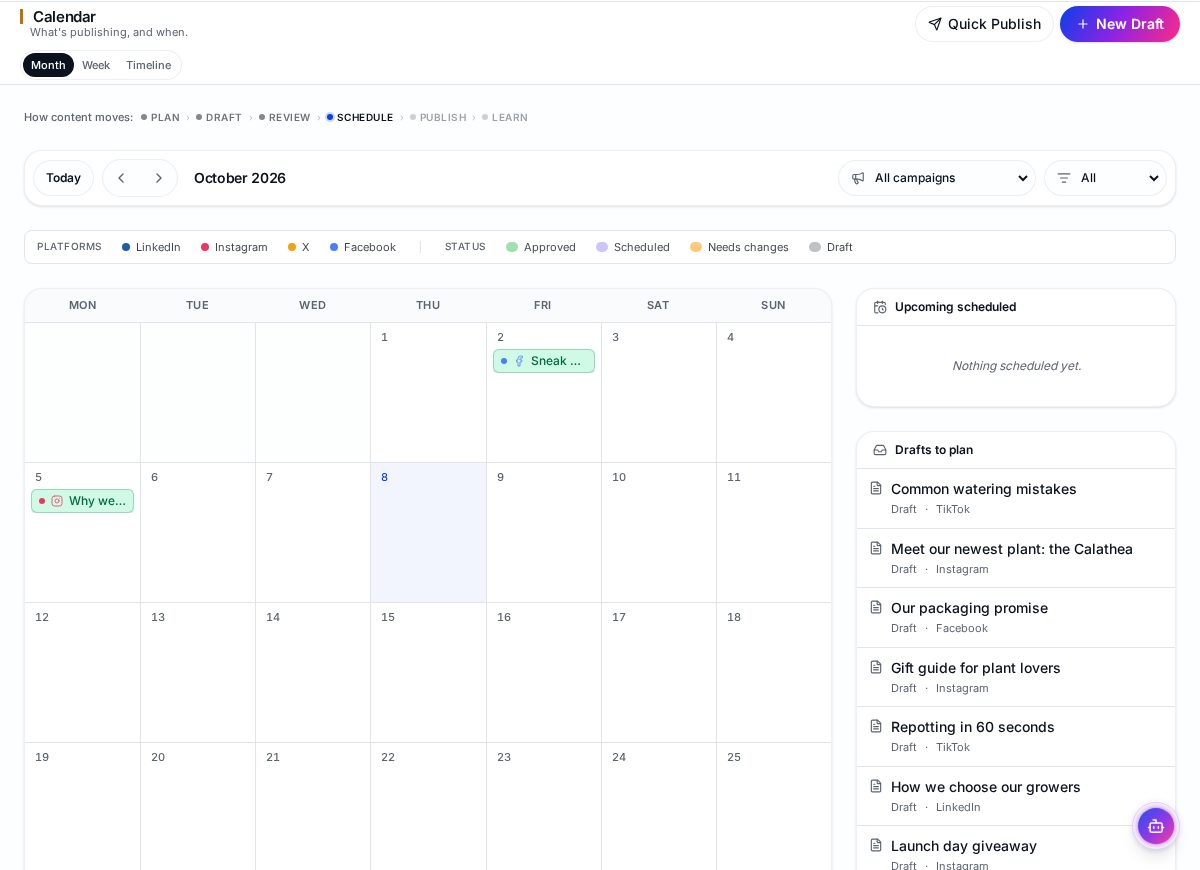
Once approved, posts land on the calendar, and drafts that still need a date are listed beside it. Read more about the full content workflow software.
Frequently asked questions
What is content batching?
Content batching is grouping similar content tasks, such as writing, designing or scheduling, and doing them for many posts in one session instead of one post at a time.
How often should I batch social media content?
Weekly is a good place to start. Once the routine is stable, many small teams move to batching every two weeks or monthly.
How many posts should I batch at once?
Start with one week of posts, often 5–10 across your channels. Increase only when the process feels comfortable.
Does batching make content feel less timely?
Not if you leave one or two open slots per week for timely posts, reactions and news.
Is batching the same as repurposing?
No. Batching is about grouping tasks. Repurposing is about turning one idea into several formats. They work well together; see how to repurpose content.
Batch your next week in Wemify
Plan, write, adapt, approve and schedule a full batch of posts in one workspace.
Continue reading
Social Media Content Strategy for Small Businesses
Build a small business social media content strategy in 13 practical steps, from goals and platforms to pillars, calendar, batching, approvals and measuring results.
ReadHow to Repurpose Content Across Social Media
A practical workflow for turning one piece of content into posts that fit LinkedIn, Instagram, Facebook and X, with examples, a checklist and common mistakes.
ReadHow to Schedule Social Media Content Efficiently
Scheduling works best as part of a workflow. Learn batching, timing, approvals before scheduling, avoiding outdated posts and reviewing your queue.
Read