How to Create a Content Calendar in Wemify
1. Open the calendar
Click Publish posts in the left menu. The Calendar tab opens first. Next to it you'll find Waiting to publish and Published posts.
At the top you can switch between Month, Week and Timeline. Use Today, Previous and Next to move around.
2. Understand the calendar view
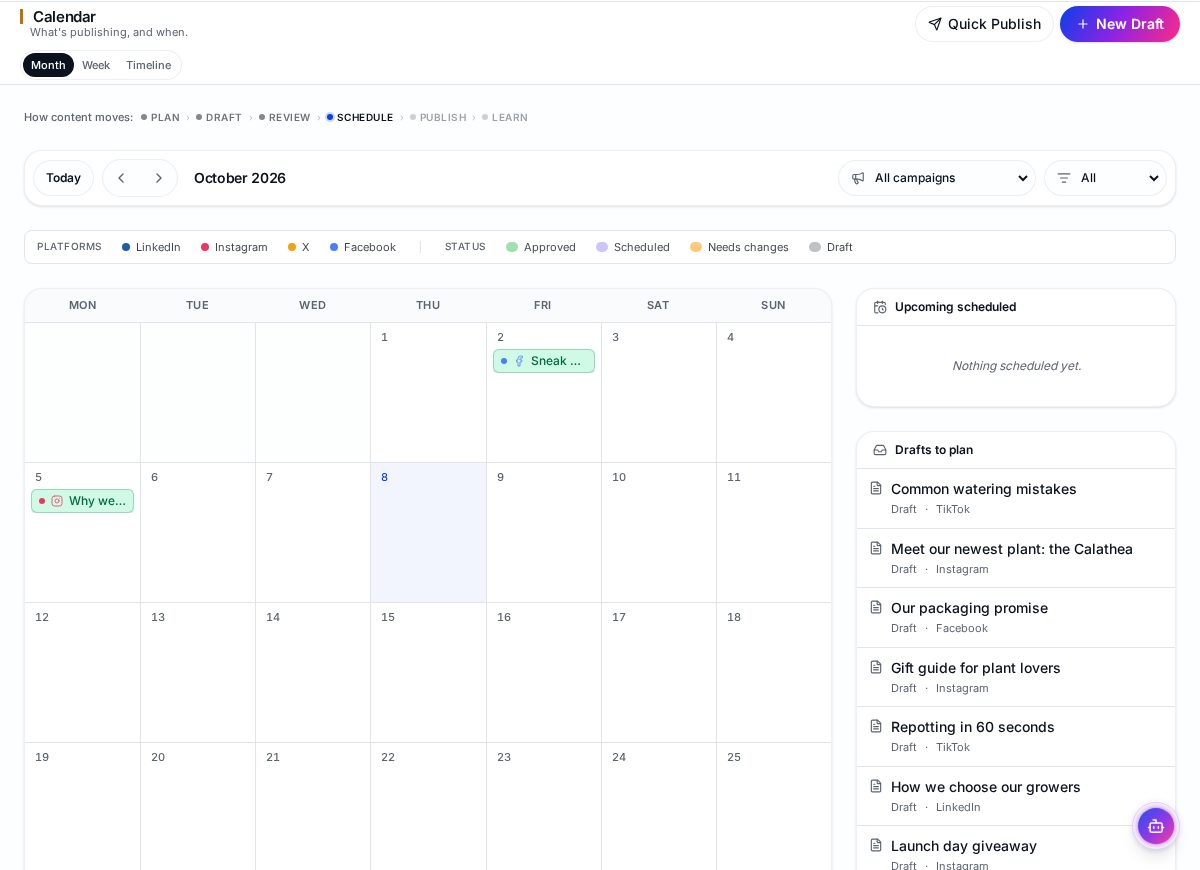
Each post appears on its date with its channel. The legend shows the colour for each platform and each status: Approved, Scheduled, Needs changes and Draft. That way you can see at a glance which days are covered and which posts still need work.
Filter by campaign or platform to look at just one launch or one channel.
3. Find drafts that need a date
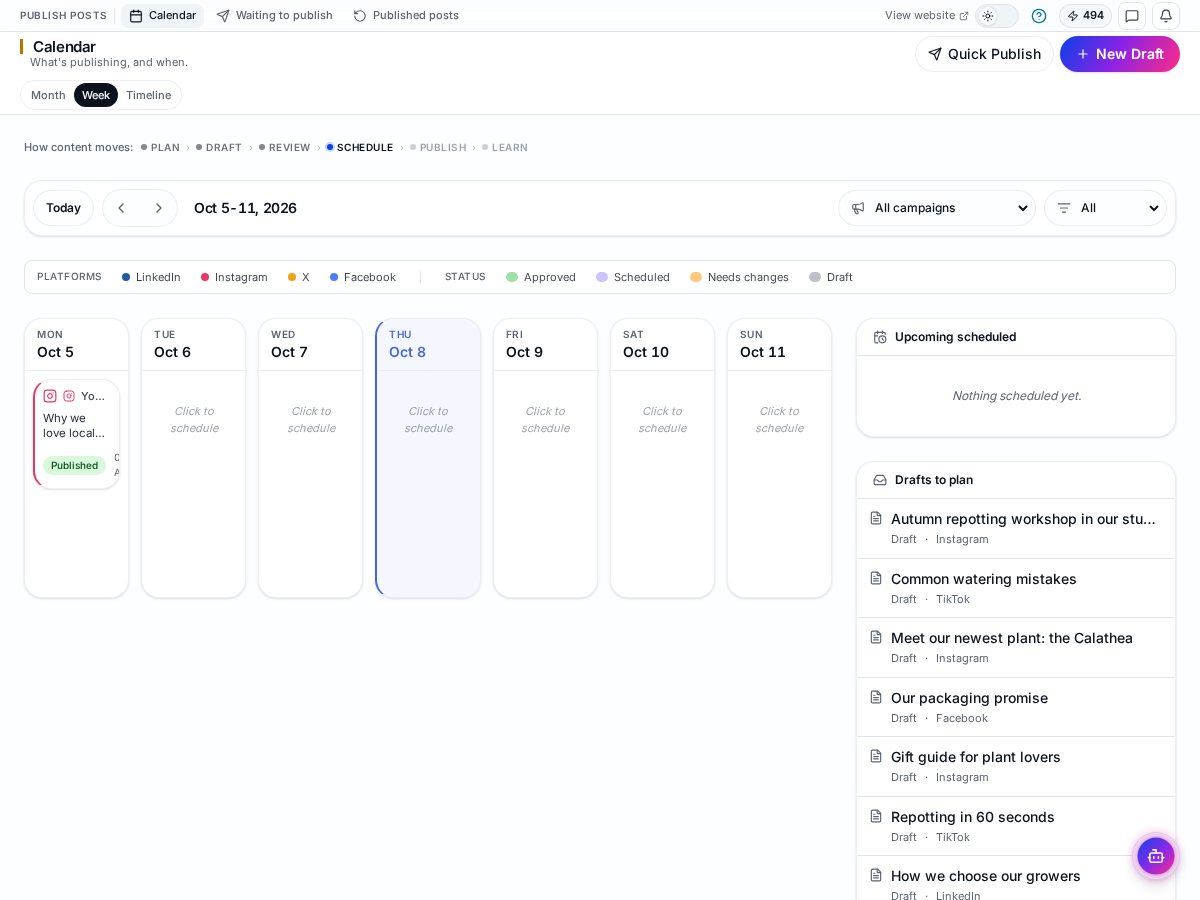
The Drafts to plan list on the right shows drafts without a date. This is your planning backlog. Upcoming scheduled shows what's already booked.
Need more content? Click New Draft in the calendar, or read How to Create Your First Post in Wemify.
4. Plan posts on specific dates
Empty days in week view say Click to schedule. To give a draft a date, open it and choose Schedule, then pick the day and time. It then shows up in the calendar.
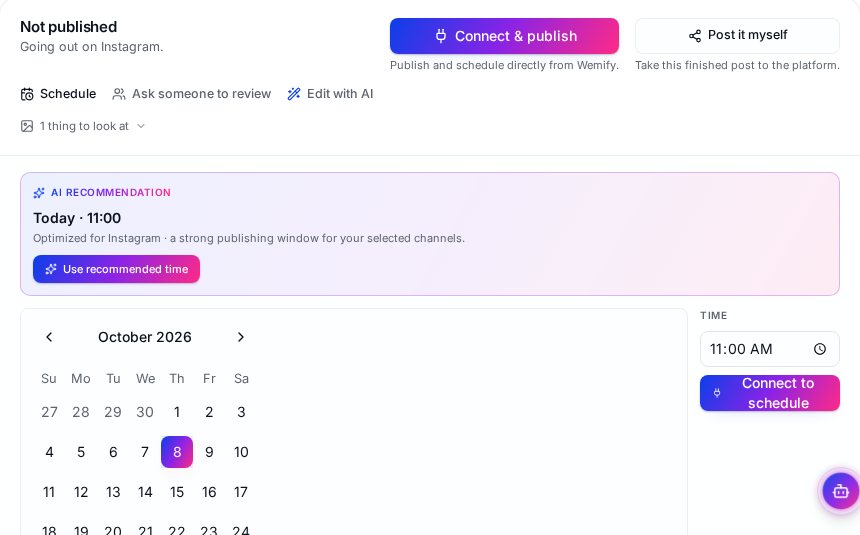
The full scheduling flow, including the suggested time, is covered in How to Schedule Social Media Content in Wemify.
5. Review the month
Switch to Month once a week and check:
- Are there gaps of several days without posts?
- Is one channel getting far more posts than the others?
- Are posts marked Needs changes close to their date?
- Are all posts for a launch or offer in place before it starts?
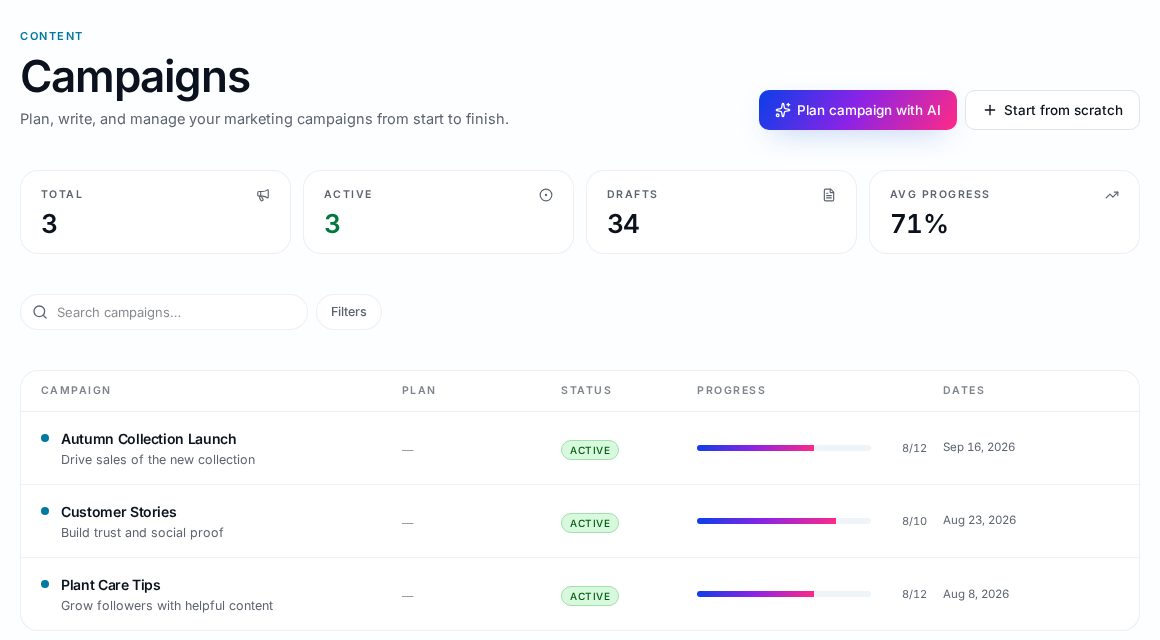
Use campaigns to group posts for a theme or launch. The Campaigns page shows progress per campaign.
6. From plan to published
Posts with a date and a connected account appear under Waiting to publish until they go out, then move to Published posts. If someone needs to approve them first, see How to Approve Content in Wemify.
Prefer to sketch the plan on paper first? Start with the social media content calendar template or the marketing calendar guide, then move the result into Wemify.
Frequently asked questions
Do I need to create a separate calendar in Wemify?
No. Every workspace has one calendar, and posts appear in it automatically when they get a date.
Where do unscheduled drafts show up?
In the Drafts to plan list next to the calendar, and on the Posts page under Drafts.
Can I see only one campaign?
Yes. Use the campaign filter in the calendar to show only that campaign's posts.
See your whole month in one place
Try Wemify free for 14 days and plan your posts on a calendar that fills itself.
Continue reading
How to Plan a Month of Social Media Content
A ten-step process for planning a full month of social media posts: goals, content pillars, ideas, platforms, calendar, creation, approvals, scheduling and review.
ReadSocial Media Content Calendar Template for Small Businesses
A free-to-copy social media content calendar template with the fields small teams actually need, an example month, and how to keep the calendar up to date.
ReadHow to Schedule Social Media Content in Wemify
Schedule posts in Wemify: open a draft, use the suggested time or pick your own date and time, then follow it in the calendar and publishing queue.
Read