How to Create Your First Post in Wemify
Before you start
You need a Wemify workspace. If you filled in Tell us about your business during setup, drafts will sound more like you, but it is not required for your first post.
You don't need a connected social account either. Without one you can still create, edit and approve posts, then publish them yourself with Post it myself.
1. Start a new draft
Go to Create posts in the left menu. This opens the Posts page, where all your content lives. Click New draft in the top right.

Pick a starting point. Something new is for products, offers or changes, A tip or opinion for advice or a point of view, and An event for invitations. Each one fills in a short brief for you. Choose Start blank if you'd rather write everything yourself.
2. Describe your post
The brief is step 1 of 2. Only the Title is required: a few words about the post. The What's this about? box is optional, but the more concrete it is (dates, places, offers), the closer the first version lands.
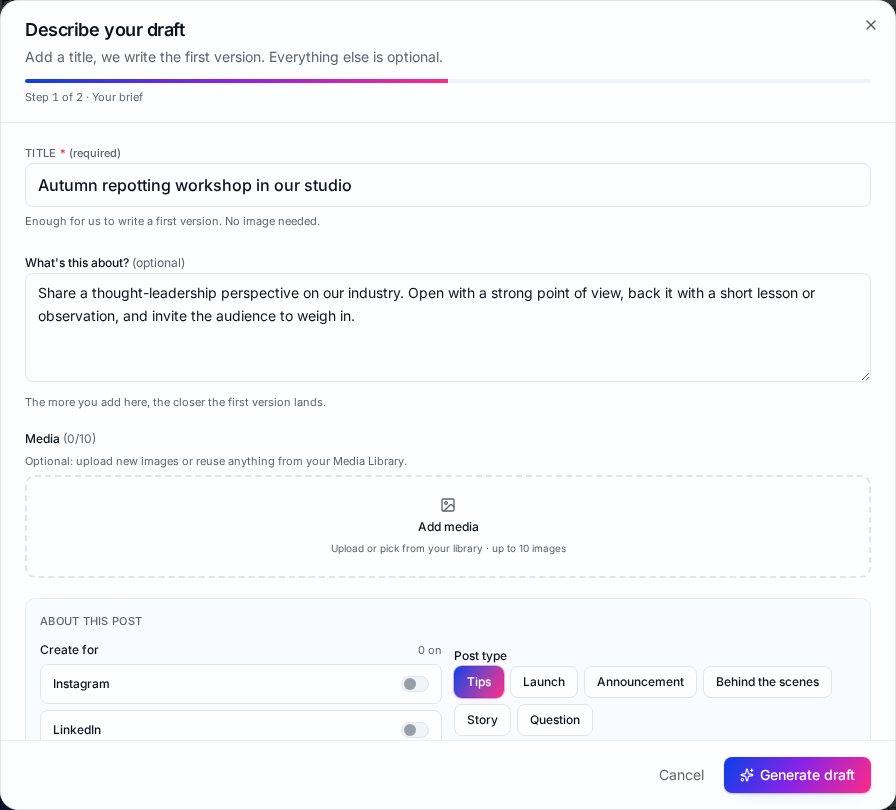
Under Media you can upload images or pick them from your media library, up to 10 per post. You can also skip images and add them later.
3. Choose where the post should go
Scroll to About this post. Under Create for, switch on each channel you want: Instagram, LinkedIn, Facebook, X, TikTok, Threads or Pinterest. Then choose a Post type, such as Tips, Launch, Announcement, Behind the scenes, Story or Question.
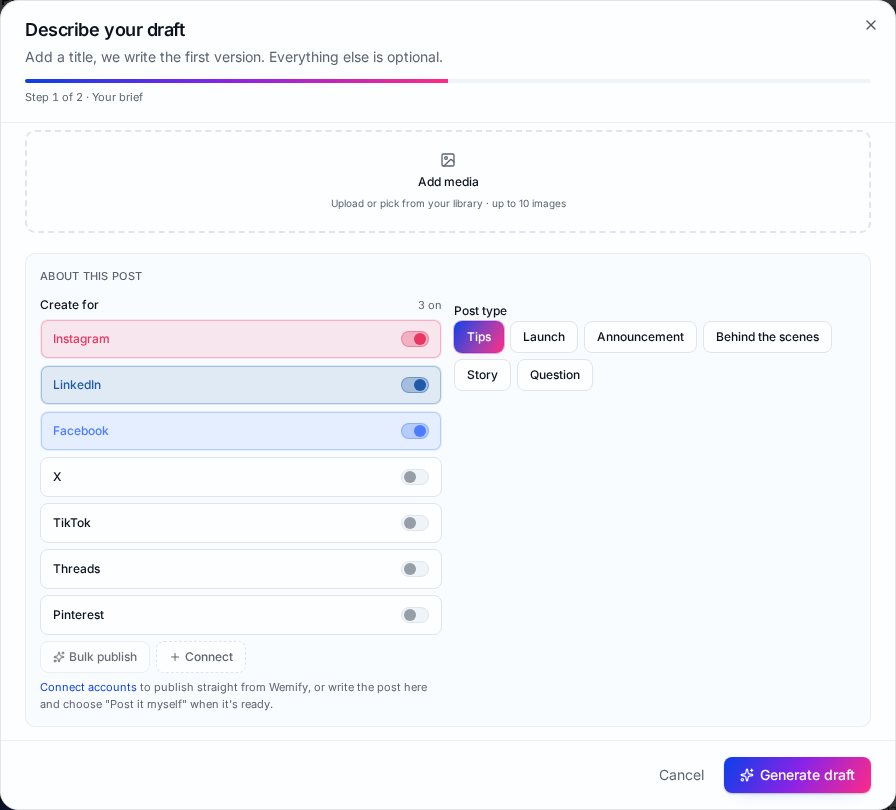
Fine-tune lets you change tone, length and language. The defaults (Friendly, Medium, English) work for most first posts. When you're ready, click Generate draft.
4. Review and edit the draft
Step 2 of 2 shows the caption Wemify wrote next to a preview of how it will look. Edit the text directly; the preview and word count update as you type.
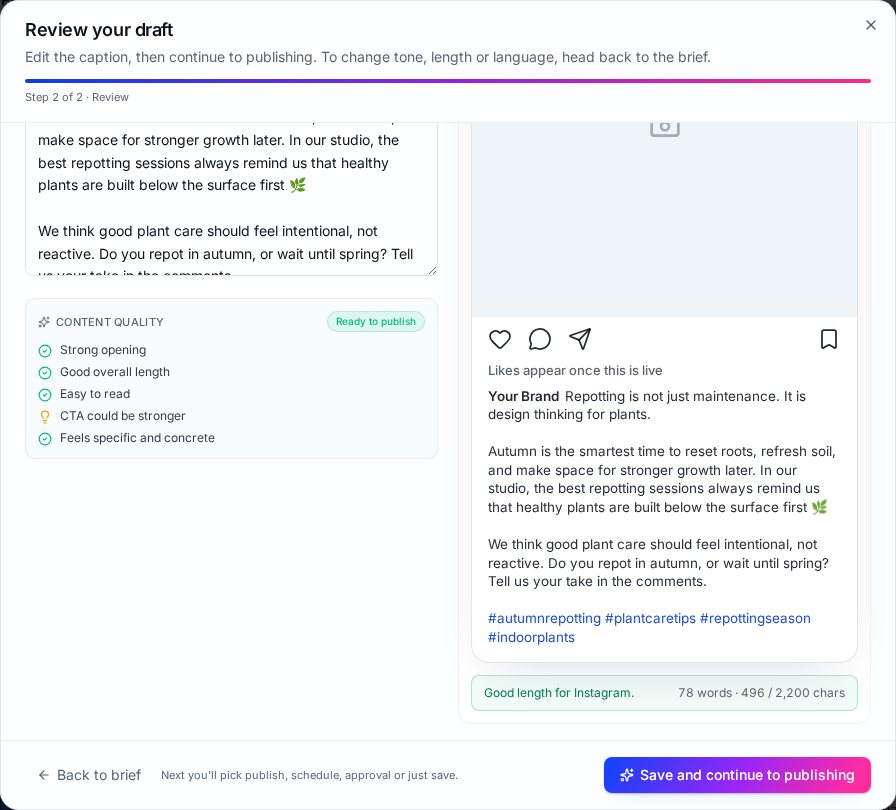
The Content Quality box checks the opening, length, readability, call to action and how specific the post is. Not happy with the angle? Click Write another version, or Back to brief to change tone, length or language.
When it reads well, click Save and continue to publishing.
5. Adapt it for other channels
If you picked more than one channel, Wemify offers to rewrite the post for each of them so it fits every platform instead of being copied word for word. That process has its own walkthrough: How to Repurpose Content in Wemify.
6. Publish, schedule or save
Your post now opens as a draft on the Posts page with the same actions every draft has:
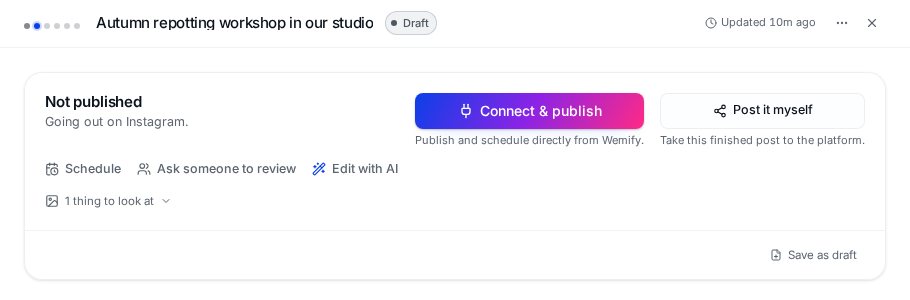
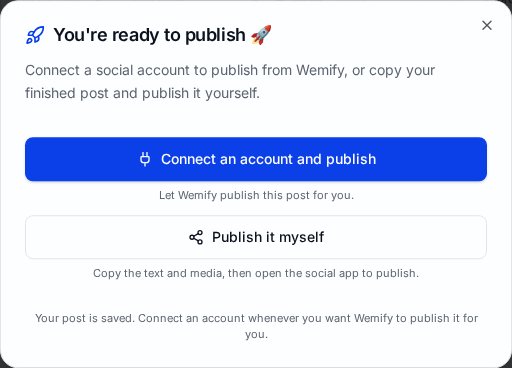
- Connect & publish: publish and schedule directly from Wemify once a social account is connected.
- Post it myself: copy the text and media, then publish in the social app.
- Schedule: pick a date and time. See How to Schedule Social Media Content in Wemify.
- Ask someone to review: send it for approval. See How to Approve Content in Wemify.
- Edit with AI: quick one-click edits such as Punch up the hook, Tighten & shorten, Improve readability or Add a call to action. Each uses 1 Creative Credit.
- Save as draft: come back to it later.
Frequently asked questions
Do I need to connect a social account to create a post?
No. You can create, edit and approve posts without one, and use Post it myself to publish manually. A connected account is needed for Wemify to publish or schedule for you.
Does generating a draft use credits?
AI writing uses Creative Credits. Your current balance is shown at the top of the app.
Can I write the post myself without AI?
Yes. Choose Start blank in the New draft window and write your own text.
Try Wemify free for 14 days
Create your first post, plan it in the calendar and get it approved in one workspace.
Continue reading
How to Repurpose Content in Wemify
Turn one post into versions for Instagram, LinkedIn, Facebook and more inside Wemify, using Create for and Rewrite for other channels.
ReadHow to Create a Content Calendar in Wemify
Use Wemify's calendar to plan posts by date, switch between month, week and timeline views, and give unplanned drafts a slot.
ReadHow to Schedule Social Media Content in Wemify
Schedule posts in Wemify: open a draft, use the suggested time or pick your own date and time, then follow it in the calendar and publishing queue.
Read