How to Schedule Social Media Content in Wemify
Before you schedule
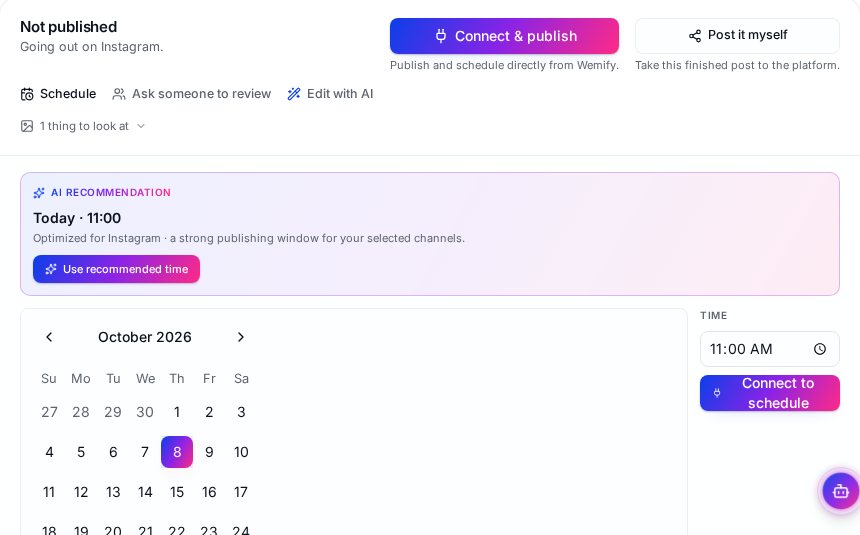
To let Wemify publish at the chosen time, connect the social account the post is for. Without a connected account, the schedule button reads Connect to schedule. You can still finish the post and publish it yourself with Post it myself.
1. Open the post
Go to Create posts and click a draft in the list, or create a new one with New draft. The top of the draft shows its status and channel, for example Not published · Going out on Instagram.
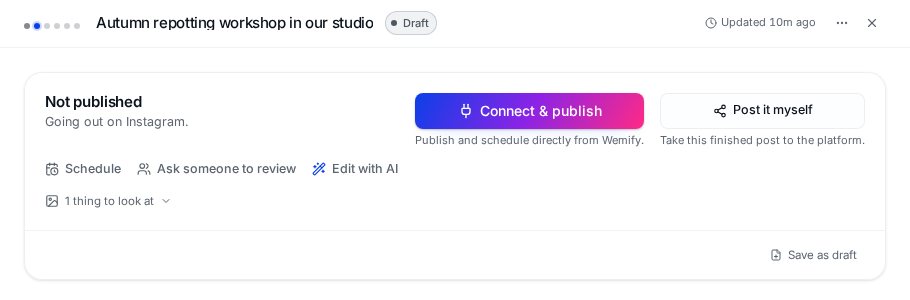
2. Get the post ready
Check the caption, image and channel before you set a date. If the post is going to several channels, adapt it first: How to Repurpose Content in Wemify. If someone needs to approve it, send it for review first: How to Approve Content in Wemify.
3. Choose a date and time
Click Schedule in the action bar. A panel opens inside the draft.
- 1
Look at the suggestion
The AI recommendation box suggests a day and time for the channel. Click Use recommended time to accept it. - 2
Or pick your own
Choose a date in the calendar and set the time in the Time field. - 3
Confirm
Click the schedule button. With a connected account the post is booked; otherwise the button asks you to connect one first.
4. Check scheduled posts
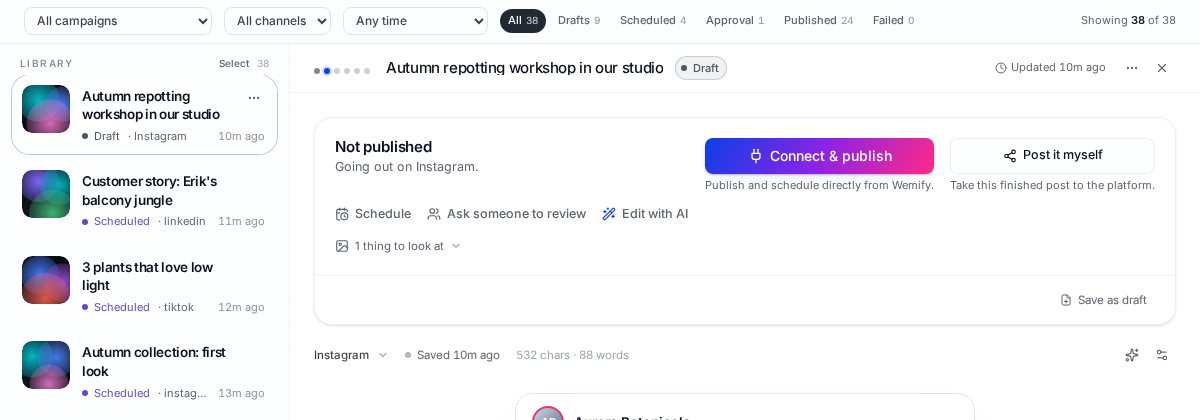
Scheduled posts get the Scheduled status. On the Posts page, the Scheduled tab shows how many there are and lists them.
5. Find them in the calendar
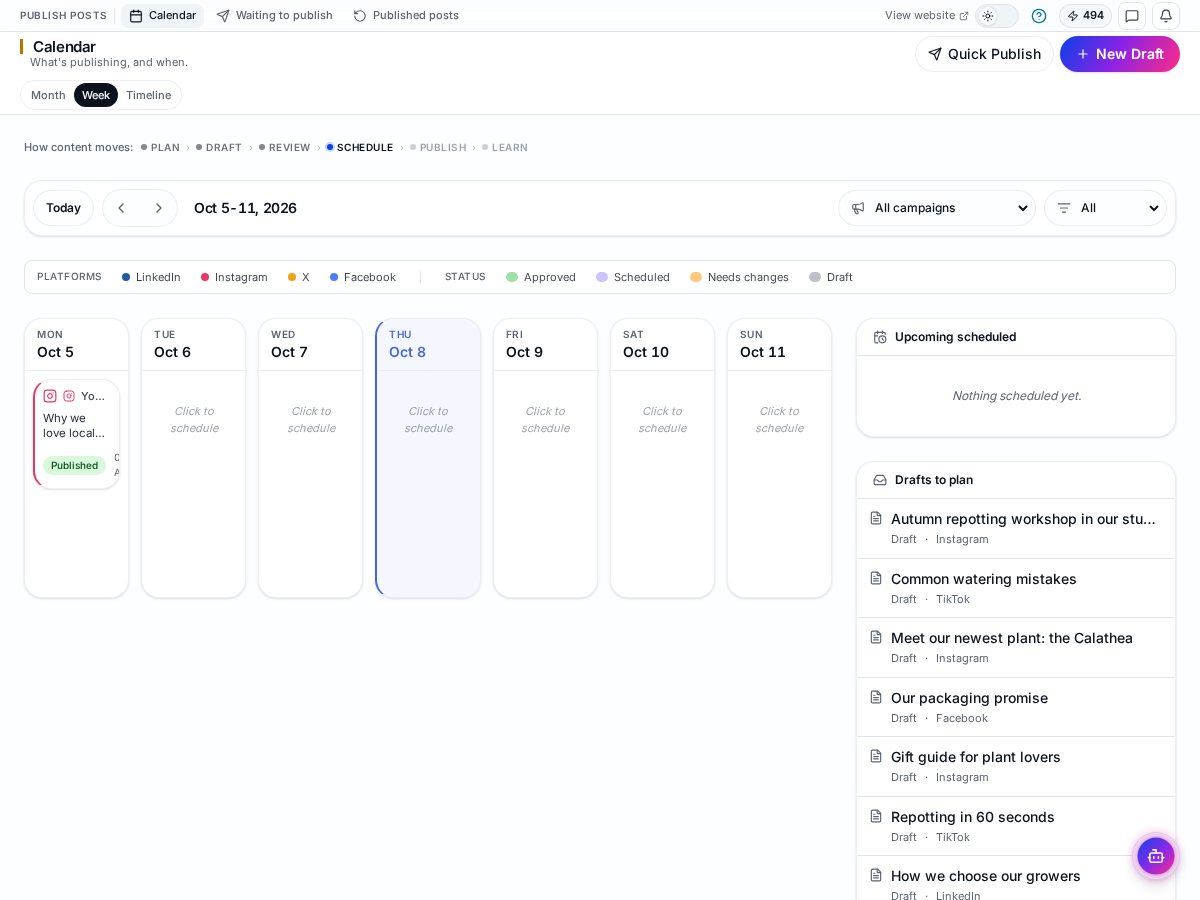
Go to Publish posts. The calendar shows each scheduled post on its date, and Upcoming scheduled lists the next ones. Waiting to publish shows posts queued to go out.
Planning a whole month? See How to Create a Content Calendar in Wemify.
6. Manage upcoming posts
- Change the time: open the post and choose a new date and time under Schedule.
- Edit the content: open the post, edit it and save before it goes out.
- Spread posts out: check the month view for days with too many or too few posts.
- Check for problems: posts that could not be published show up under Failed on the Posts page.
Scheduling is one step in the bigger flow. See how it connects to planning, writing and approval in How to Manage Your Content Workflow in Wemify.
Frequently asked questions
Why does the button say Connect to schedule?
Wemify needs a connected account for that channel to publish at the chosen time. Connect one, or use Post it myself to publish manually.
How does Wemify choose the recommended time?
It suggests a time window for the selected channel. You can always pick your own date and time instead.
Where can I see everything that is scheduled?
In the Scheduled tab on the Posts page and in the calendar under Publish posts.
Book your next week of posts
Try Wemify free for 14 days and schedule posts straight from your drafts.
Continue reading
How to Schedule Social Media Content Efficiently
Scheduling works best as part of a workflow. Learn batching, timing, approvals before scheduling, avoiding outdated posts and reviewing your queue.
ReadHow to Create a Content Calendar in Wemify
Use Wemify's calendar to plan posts by date, switch between month, week and timeline views, and give unplanned drafts a slot.
ReadHow to Repurpose Content in Wemify
Turn one post into versions for Instagram, LinkedIn, Facebook and more inside Wemify, using Create for and Rewrite for other channels.
Read