Social Media Content Calendar Template for Small Businesses
What this template is (and isn't)
A marketing calendar maps campaigns, seasons and launches across the year. A content calendar works at the level of individual posts: what goes out, where, when and in what state it is.
If you want the planning process that fills the calendar, read how to plan a month of social media content. This article is about the calendar itself: the structure, the fields and how to keep it useful.
The template: columns to include
Copy these columns into a spreadsheet. One row is one post on one platform. If a post goes to three channels, it gets three rows, because the caption, format and time usually differ.
| Column | What to write | Why it matters |
|---|---|---|
| Date | The planned publishing date | Shows gaps and crowded days at a glance |
| Platform | Instagram, LinkedIn, Facebook, X… | Each row is one channel version |
| Content pillar | One of your 2–4 recurring themes | Keeps the mix balanced |
| Topic | What the post is about in a few words | Makes the month scannable |
| Format | Single image, carousel, video, text | Helps plan production work |
| Caption / content | The final text, or a link to it | One source for the approved copy |
| CTA | What you want people to do | Every post should have a purpose |
| Status | Idea, drafting, in review, approved, scheduled, published | Shows what needs work today |
| Approval | Who approves and when they did | Avoids publishing unapproved posts |
| Scheduled date | When it is actually queued to go out | Can differ from the planned date |
Optional columns: owner, campaign, asset link and a notes field for results. Add them only if you will actually fill them in.
Example month for a small home-decor shop
Here is a shortened example of the first two weeks of a month with three posts per week. Pillars: inspiration, product, behind the scenes, customers.
| Date | Platform | Pillar | Topic | Format | CTA | Status |
|---|---|---|---|---|---|---|
| Mon 2 | Inspiration | Three ways to style a small hallway | Carousel | Save for later | Scheduled | |
| Wed 4 | Product | New linen cushions, colours | Single image | Shop link in bio | Approved | |
| Wed 4 | Product | New linen cushions, colours | Single image | Visit the shop | Approved | |
| Fri 6 | Behind the scenes | Unpacking the autumn delivery | Short video | Comment favourite | In review | |
| Mon 9 | Customers | A customer's living room makeover | Carousel | Share your space | Drafting | |
| Wed 11 | Behind the scenes | What running a small shop taught us about suppliers | Text | Follow the page | Idea | |
| Fri 13 | Inspiration | Autumn table setting | Single image | Save for later | Idea |
Two things to notice: the same product post is two rows because the CTA differs per platform, and statuses move from 'idea' to 'scheduled' the closer the date gets. That is normal. A calendar where everything is already scheduled a month out is usually not being updated.
How to use the template week to week
- 1
Fill in dates and platforms first
Decide how often you post per channel and block those slots in. Empty slots are useful: they show what still needs ideas. - 2
Assign a pillar to each slot
Before topics, spread pillars so no week is only promotion. If you need pillars, see how to create content pillars. - 3
Add topics and formats
Fill slots from your ideas backlog. Pair the format to the platform. - 4
Write in batches
Write captions for several rows at once and move their status to 'drafting' or 'in review'. Here is how to batch your content. - 5
Record approvals
Note who approved each row and when. Only approved rows get a scheduled date. - 6
Schedule and update status
Once queued in your scheduler, fill in the scheduled date and set status to 'scheduled'. After it goes live, mark it 'published'. - 7
Review once a week
Ten minutes every week: move unfinished rows, fill gaps and note what performed well.
Common calendar template mistakes
- Too many columns. A calendar nobody fills in is worse than a simple one that is always correct.
- One row for all platforms. You lose track of channel versions and their different captions.
- No status column. Without it you can't tell what is ready and what is still an idea.
- Calendar and scheduler out of sync. When you schedule a post, update the row the same day.
How the same calendar works in Wemify
A spreadsheet works, but you have to keep it in sync with your drafts, approvals and scheduler by hand. In Wemify, the calendar is built from the posts themselves: each post has its channel, status and date, and the month view shows it.
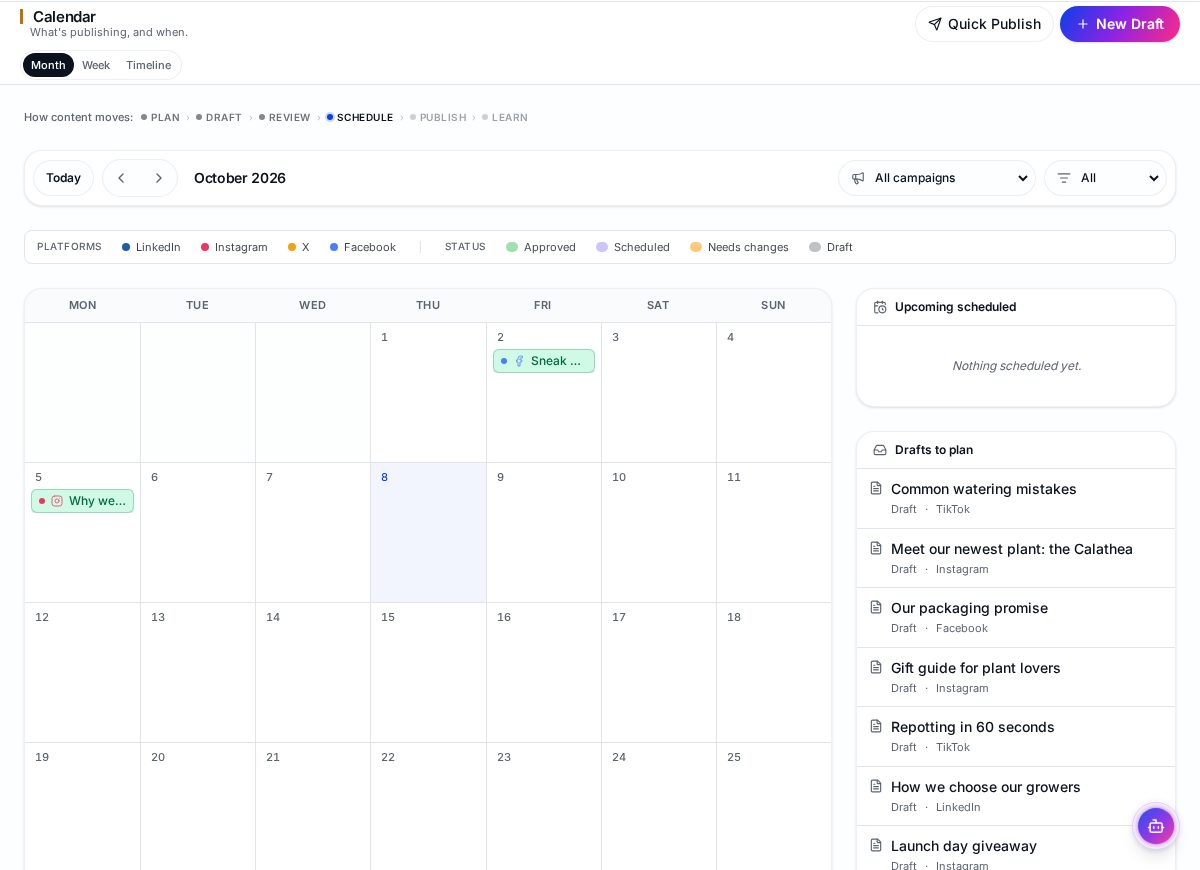
Drafts that don't have a date yet are listed beside the calendar, so empty slots and unplanned posts are visible at once. When a post is approved and scheduled, its status updates without editing a separate sheet. To compare dedicated tools, see the best content planning software.
Frequently asked questions
What should a social media content calendar include?
At minimum: date, platform, topic, format, caption, status and scheduled date. Content pillar, CTA and approval are worth adding for small teams.
Is a spreadsheet good enough as a content calendar?
Yes, especially when you start. It becomes harder when several people approve posts or you publish to many channels, because the sheet and scheduler drift apart.
How far ahead should my content calendar go?
Many small businesses plan topics a month ahead and finalize posts one to two weeks ahead.
What is the difference between a content calendar and a marketing calendar?
A marketing calendar covers campaigns and seasons over the year. A content calendar lists individual posts with dates, channels and statuses. See our marketing calendar guide.
Get a calendar that updates itself
Plan posts, track approvals and see your month in one Wemify calendar.
Continue reading
How to Create a Content Calendar in Wemify
Use Wemify's calendar to plan posts by date, switch between month, week and timeline views, and give unplanned drafts a slot.
ReadHow to Plan a Month of Social Media Content
A ten-step process for planning a full month of social media posts: goals, content pillars, ideas, platforms, calendar, creation, approvals, scheduling and review.
ReadMarketing Calendar Template for Lean Teams
A calm, practical marketing calendar template and step-by-step guide for lean teams. Plan campaigns, content, and channels without complex tools.
Read